Tuesday, July 28, 2009

Easiest Elegant Dessert Platter...Ever!


Tonight my MOPS group has a mom's night in and last minute (8:30 last night!) I got the green light to go. Hubby travels and works late so I wasn't planning on attending. So without getting to the store I searched for something quick but yummy to make with items in my pantry. I made a chocolate mousse the other day that didn't end up having the mousse texture I was looking for but I thought it would make a fantastic truffle. Yep...outstanding and super easy. With the left over white chocolate (with the truffle meltings too) I made some white bark. Since I didn't have very many truffles I took packages of Baker's chocolate (one semi-sweet, one white) and made marbled bark and peppermint bark. I am happy to share this on Jen's Tasty Tuesday blog party. Check out her site to find yummy recipes!


Yummy Chocolate Raspberry Truffles

5 ounces dark chocolate (I used intense dark by Ghiradelli, next time I might not go soooo dark)
1 1/4 cup heavy cream
1 - 2 teaspoons raspberry flavoring
White melting chocolate (I used Baker's squares and used two boxes, 12 ounces)
Sprinkles if desired
  • Heat dark chocolate and cream over medium-low heat. Stir frequently until melted. Remove from heat and add flavoring. Cool completely, stirring every now and then to keep mixed well. Cover and store in fridge overnight, make sure it is completely cooled first! I think it is best to divide into two smaller bowls, it makes working with the chocolate easier - it melts so fast in your hands!
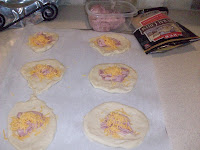
  • Next day roll chocolate mixture into bite sized balls and place on cookie sheet lined with wax paper. Work fast because the chocolate melts quickly!
  • Let harden in freezer for about 30 minutes, half of mine hardened for about five hours since baby woke up! They seemed to turn out just fine. :)
  • Melt white chocolate 6 ounces at a time in microwave per box instructions.
  • Cool slightly and drop one cold truffle into chocolate mixture. Pick up with candy fork and spoon chocolate on top. Work quickly and set on cookie sheet lined with wax paper. Sprinkle with colored sugar if desired.
  • Stir left over white chocolate and spread on wax paper too. It will make great bark!
  • Let chocolate harden and then store in fridge until ready to eat...if you can wait that long!

Marble Bark

Melting chocolate (I used Baker's - one box of semi-sweet and one box of white).

  • In two separate bowls melt six ounces semi-sweet and 6 ounces white chocolate in microwave per box instructions.
  • Spread semi-sweet chocolate on wax paper lined cookie sheet and drop white chocolate on top. Marble/swirl with knife.
  • Let cool in fridge and break into bite size pieces.

Peppermint Bark

2 ounces semi-sweet melting chocolate (the 2 ounces left over from making marble bark)

1/2 teaspoon peppermint extract

  • Melt two ounces chocolate in microwave per box instructions.
  • Stir in extract.
  • Spread onto wax paper lined cookie sheet.
  • Cool in fridge and break into bite sized pieces.

Monday, July 27, 2009

Back in the Saddle Again!

Garage saling is something I love, love, love! However, I have taken almost two years off due to pregnancy, moving, and new (nursing constantly) baby. This past Friday I eagerly headed out to garage sale and in the short time I had (hubby agreed to listen for the little one until 9:00) made it to five sales. I was so excited I didn't even try to bargain...what can I say, I'm a little rusty! Overall I think I did pretty well and spent $20.50. Check out Rhoda at Southern Hospitality to see what treasures other people found this weekend, it's a blog party!

Check out my awesome Christmas wreath, almost 3 1/2 feet! It will look great above our garage this December...$5.

  • Working fountain for the guest bath (once our drought goes away and we can use indoor/outdoor fountains again)...$3.
  • Cute little lamp shade for a hanging bulb, can't wait to put it above the changing table...$2.
  • Heavy planter about 18" tall, love the color...$5.
  • Pampered Chef Ice Shaver, in box with instructions and all three bowls/lids...$5.
Adorable little pumpkin...50 cents.
Thanks for stopping by, I can't wait to get out again this weekend and bargain!

Tuesday, July 21, 2009

One Bird, Two Pots

For a small lunch play date today I offered to take chicken salad sandwiches, one of my favorites! Dear Hubby hates chicken salad so I also used the chicken to try a new recipe for chicken and spinach enchiladas. For my chicken salad I always buy a honey mesquite rotisserie chicken from the grocery store, saves me time and is yummy! I am sharing my recipe on Jen's Tasty Tuesday, or hoping I am sharing. I am new to this!

Got all my ingredients ready...can you believe I forgot to add the almonds to the chicken salad. Was it Monday today??!!

I pulled the chicken apart without the skin and cut into bite size pieces with my handy kitchen shears. I used about 1/3 chicken for sandwiches and about 2/3 for enchiladas.

Yummy! This plate belongs to the girl hosting the play date...never return an empty plate! Would have been soooo much better with sliced almonds, oh well!
For enchiladas put some chicken mixture and cheese on each tortilla, roll up and place seam side down in greased dish.

Top enchiladas with remaining sauce and cheese. One to bake and one to freeze, perfect!

Bake at 350 degrees for about 30 minutes. Dear Hubby and I voted this recipe a keeper!

I fell in love with these shower curtains at Home Goods, I think I will tea stain the brown ones and use for living room curtains. The black ones I hope to make slip covers for my kitchen chairs, which is adjacent to my living room. The paintable wallpaper has a future home in my dining room picture frame molding. Check back to see the finished projects, I hope sooner rather than later!


Yummy Chicken Salad

About 2 cups cooked chicken (I use rotisserie)
2 Tablespoons lemon juice
1 teaspoon salt
1 cup chopped celery

Mix ingredients and refrigerate. Can be done night before.

Add the following:
1/3 cup miracle whip? (I don’t measure, I only use a little)
1 cup grapes, sliced
1/2 cup sliced almonds
1 small apple, chopped
I think this recipe is best on croissants.
Chicken and Spinach Enchiladas (a modified Southern Living recipe)
About 4 cups cooked chicken
chopped onion to taste
1/4 cup butter
10 ounce package chopped spinach, thawed and drained
24 ounces sour cream
1 can diced green chiles
3/4 cup milk
1 1/2 teaspoon cumin
20 flour tortillas (best if fresh from bakery or restaurant)
2 cups shredded Monterey Jack Cheese
Saute onion in butter until tender. Add spinach, sour cream, chiles, milk, cumin and stir until mixed. Add about 2/3 spinach mixture to chicken. Place a spoonful of spinach mixture and a sprinkle of cheese on each tortilla. Roll up and place seam side down in a greased dish. Cover enchiladas with remaining sauce and cheese. Bake at 350 degrees for about 30 minutes.

Friday, July 17, 2009

Cinnamon Rolls and Kolaches

Well I love to cook and my dear hubby loves to fish. This weekend he and a friend went to fish in a bass tournament so dear daughter and myself are on our own. Whenever he goes fishing I always make goodies to send with him...I don't want him to starve! Usually I send fried pies (only baked of course!) for him to eat as dessert or breakfast as well as cookies. This time I sent him with my kitchen sink cookies (I call them that because I literally use any and all nuts and chips I have on hand and already open) and homemade kolaches. Homemade cinnamon rolls were offered but he declined, more for me...yummy! Dear daughter and I had a play date at the park this morning so I made cinnamon rolls to share and used half the dough to make ham and cheese kolaches to send to the lake.

Mmmmm, cookies and milk. The great thing about cookies is that you can sample your work and make sure they are presentable. I wish I could sample cakes and pies but it is a bit harder to hide that evidence!

My poor old bread machine, this is the only time I use it. You can make this dough by hand, I just always overwork it and make it a little too chewy. This was a wedding gift back in 2000, ahhh! Here are the fancy ingredients: salt, yeast, sugar, eggs, flour - plus water, milk and butter. You melt 1/4 cup butter, 1 cup milk, and 1 cup water in saucepan on stove. Let cool.
If you are using a bread machine make sure you layer your ingredients as directed, my machine likes liquids on the bottom with yeast being very last ingredient added.

Once butter mixture has cooled you add 2 slightly beaten eggs, 1/2 cup sugar, 1 teaspoon salt, 6 cups flour, and 1 1/2 Tablespoon yeast. Make sure you set your machine for a 2 pound loaf or you will have a big mess, use dough cycle and walk away!

Can't you just smell the yummy dough! Take dough out and divide in half. Roll each half into rectangle on lightly floured surface.

Many things in life I don't measure (since baby my waist in one!). For the filling I use sugar, butter, and cinnamon. Notice my fancy roll cutter...waxed dental floss. Works like a charm!

Spread with soft butter, for this I always use my tub stuff, sprinkle with cinnamon and sugar and roll up into a big log. Cut into rolls with your floss. Place in greased dish with your rolls not touching so that they will cook more evenly once they rise. Cover with a dishtowel and place in a warm place to rise for about 30 minutes. They should double. Bake at 375 degrees for about 20 minutes or until lightly browned.

Now with the other half I made kolaches for dear hubby. Notice my fancy cutter - plastic Gerber bowl!
Top each circle with ham and cheese, or filling of your choice.

Fold over and press edges to keep filling in while baking!
Cover and let rise in warm place about 30 minutes. It is harder to tell that these double.

Mmmm. Doesn't this make you want to lick the screen! You should smell them. Wow!

Perfect for a play date in the park don't you think!
Cinnamon Rolls
(this dough makes wonderful dinner rolls and kolaches)
Make sure your bread machine has a 2 pound setting.
Add the ingredients in the order your machine prefers.
1/4 cup unsalted stick butter
1 cup milk
1 cup water
Mix in saucepan over low-medium low heat until butter melts. Cool until no longer hot.
To butter mixture add the following:
2 slightly beaten eggs (remember to cool your butter mixture or you will scramble your eggs on accident!)
1/2 cup sugar
1 teaspoon salt
6 cups flour
1 1/2 Tablespoon active dry yeast
Once your dough cycle is done, take out bread pan and punch down dough. Separate dough into 2 sections. On a floured surface roll each section into a rectangle so that you have 2 rectangles. On each rectangle spread soft butter, cinnamon and sugar. Roll each rectangle into a roll (a big snake) and cut. It is helpful to use dental floss to cut the cinnamon rolls. Place rolls in a greased dish and cover. Let rolls rise in a warm place for 30 minutes. Bake for 20 – 25 minutes in a 375 degree oven. Ice while warm
For the icing I use 1/2 log of cream cheese, 1 Tablespoon melted butter, and a splash of vanilla and mix well. To this mixture I add powdered sugar until it has the taste I am looking for and then add milk until it becomes a decent spreading consistency.
Hope this helps you get "on a roll"!!